Today’s “Thank You” card is a little different. I made it with MDS (My Digital Studio). One of my customers purchased some Digital Downloads, and I wanted to send her a Thank You. This particular customer keeps everything we do as a “sample” for her to copy later. So I thought the perfect sample for her would be a Digital one she can use in MDS. She also loves purple and the XL Two-Step Bird Punch. Speaking of the bird punch, this card qualifies for Stampin’ Royalty’s SR#55 – “anything with wings” theme challenge -- and the Friday Mashup #28 challenge -- using Birds.
I found this layout on the My Digital Studio website. This website is such a helpful resource. They have samples, a forum with challenges, tips & tricks, and a blog to keep you updated with the latest MDS downloads. If you haven’t been to the MDS website, you really need to check it out.
Back to the sample: This is an easy layout to replicate and configure for many uses. Digitally, I added circle punches and resized them. For a traditional card, use multiple sizes of Circle Punches. And to create a scrapbook page, just use some pictures instead of all the patterned paper. I used only items that are included with the original software. So, if you purchase MDS, you too, can easily create this card or scrapbook page.
Come back next Friday for more MDS samples. Thanks for stopping by, and Have A Great Weekend!
Card Recipe: Stamps- Thank You Kindly, Baroque Motifs; Paper- Crumb Cake (Kraft in MDS), Perfect Plum Villa, Perfect Plum Solid, Pink Pirouette Solid, Mellow Moss Solid, Rich Razzleberry Small Polka Dot, Rich Razzleberry Textile; Ink- Perfect Plum; Accessories- Circle Punch, XL 2-Step Bird Punch, Silver Brads, Chocolate Chip Stitching
Showing posts with label MDS. Show all posts
Friday, January 21, 2011
Thursday, January 6, 2011
A Digital Thank You page
I wanted to make a special Thank You for one of my friends. We exchange Christmas gifts every year. This year, she included toys for my dogs with my present. I thought that was the sweetest thing. And I wanted her to know how much the dogs and I appreciated her thoughtfulness.
So, I took pictures of Roxie and Jazzmine playing with their new toys. Then I made a “Thank You” Scrapbook page from those pictures, plus the dogs Christmas picture wearing their red and white collars. I created the page in My Digital Studio (MDS) using the Deck The Halls download. My journaling is the Thank You note to my friend.
Jeanne got a unique “Thank You card”, and I got another scrapbook page done :-)
Please let me know if you have any questions. Thank you for stopping by!
So, I took pictures of Roxie and Jazzmine playing with their new toys. Then I made a “Thank You” Scrapbook page from those pictures, plus the dogs Christmas picture wearing their red and white collars. I created the page in My Digital Studio (MDS) using the Deck The Halls download. My journaling is the Thank You note to my friend.
Jeanne got a unique “Thank You card”, and I got another scrapbook page done :-)
Please let me know if you have any questions. Thank you for stopping by!
Sunday, January 2, 2011
CCMC131 -- Feb 2010 Record Snowfall
Happy New Year! Let’s talk about resolutions. My number one resolution is to get healthier – eat better and exercise more. I let you know how that goes.
My next resolution is to get some scrapbooking done. I am so far behind, I feel like I’ll never get caught up. So I’m going to make a resolution to get 6 pages done each month. That’s less than 2 pages a week … surely I can do that.
I used pictures from last year’s record snowfall to create this page for the Create With Connie and Mary “Let It Snow” challenge – CCMC131. Whether it’s Digital or Traditional scrapbooking, I think the hardest part is figuring out which pictures to use and how to make them the focus of my page while still adding cool embellishments. This layout came to mind because I already had part of it planned for my Blog re-design. You’ll soon be seeing some of these same embellishments for my Blog Header and Buttons. I’m using My Digital Studio (MDS) for all this.
Oh, and stay tuned for the next set of dog pictures I scrap. They should be quite comical.
Please let me know if you have any questions. Thank you for stopping by!
My next resolution is to get some scrapbooking done. I am so far behind, I feel like I’ll never get caught up. So I’m going to make a resolution to get 6 pages done each month. That’s less than 2 pages a week … surely I can do that.
I used pictures from last year’s record snowfall to create this page for the Create With Connie and Mary “Let It Snow” challenge – CCMC131. Whether it’s Digital or Traditional scrapbooking, I think the hardest part is figuring out which pictures to use and how to make them the focus of my page while still adding cool embellishments. This layout came to mind because I already had part of it planned for my Blog re-design. You’ll soon be seeing some of these same embellishments for my Blog Header and Buttons. I’m using My Digital Studio (MDS) for all this.
Oh, and stay tuned for the next set of dog pictures I scrap. They should be quite comical.
Please let me know if you have any questions. Thank you for stopping by!
Saturday, December 25, 2010
Monday, December 13, 2010
Creating Christmas Labels with MDS
12 Days until Christmas … First, I want to let you know that I’m having a drawing for the “Northern Hearts” stamp set . For each $40 purchase you make from my Stampin’ Up store, I’ll enter your name in the bucket. I’ll be drawing the winning name on Dec 20th. Just CLICK HERE to start shopping. And don't forget the 20% bundles that end on Dec 16th.
Now, my tip for today is using My Digital Studio (MDS) to create your own decorative mailing labels. I created a small image in MDS using the Ornament stamps from Tree Trimmings (included with the original software). After I exported to a JPEG file, I resized my image to fit the plain labels I purchased from an office supply store. I used Word to setup my labels and just inserted my resized image.
And this is what my mailing labels look like.
Please let me know if you have any questions. Thanks for stopping by!
Now, my tip for today is using My Digital Studio (MDS) to create your own decorative mailing labels. I created a small image in MDS using the Ornament stamps from Tree Trimmings (included with the original software). After I exported to a JPEG file, I resized my image to fit the plain labels I purchased from an office supply store. I used Word to setup my labels and just inserted my resized image.
And this is what my mailing labels look like.
Please let me know if you have any questions. Thanks for stopping by!
Labels:
MDS
Thursday, December 2, 2010
More MDS Calendar pages
Good morning! Yesterday, I told you about the MDS Calendar I had printed, and how impressed I am with the quality of the Calendar. I thought I'd show you a few more months today.
If you're interested in a personalized calendar, I can use these layouts (or similar ones) with your pictures and create a calendar you can give as a special Christmas gift. The cost is just $32, and that includes tax and shipping. Please Email Me if you're interested. Thanks for stopping by!
Wednesday, December 1, 2010
My Family Calendar with MDS
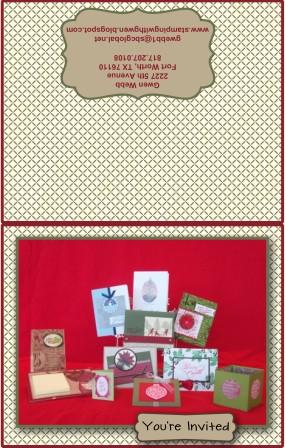
I can’t believe it’s already December 1st! I’ve been preparing for a Stampin’ Up Open House this weekend. I created a card style invitation in My Digital Studio (MDS). I emailed my JPEG files to an office supply store and had my “cards” printed. Then I folded the cards, attached ribbon, and distributed almost 300 invitations in my neighborhood. I’ll display the invitation at the bottom of this post. If you’re in the area, I’d love for you to come.
I’ve also been working on a family calendar in MDS. My parents are older; they have lots of appointments, plus keeping track of their kids' and grandkids' activities. They live by their calendar. J Therefore, I thought a personalized calendar would be the perfect gift for my parents. I decided not to use the delivered “calendar” layout. My mom wants plenty of space to write everything on the calendar. So I made my own layout allotting as much space to each day as possible. Then I worked on a corresponding “family page” for each month. I thought it looked great on my computer.
Well, I just got my printed calendars (wow, that was quick turnaround!). I don’t have the words to describe how fabulous these look. As I said, an office supply store printed my Open House invitations, and I was very pleased with how great they looked. My calendars truly look like something you’d buy from Barnes and Noble except it's my family. Let’s just say, this will be a gift to make my mom cry – in a good way!
Here are a couple months from the calendar. (I’ll show more throughout the week.)
And here’s the invitation. The first picture is the front and back cover of the card. The second picture is the inside of the card, with all the details.
Please let me know if you have any questions. Thank you for stopping by!
Gwen
Thursday, November 4, 2010
Jackson's MDS Birthday Invite
My friend, Janet, asked me about using My Digital Studio (MDS) to create a Party Invitation for her son's birthday. I pointed her to Stampin' Up's MDS website -- MDS Samples -- and told her to design her card. Then I let her create the Invite on my laptop, while I explained how MDS works. This was her very first time using MDS, and she completed the 4-card layout in just over an hour. Keep in mind, the majority of the time was spent lining everything up and getting 4 cards on a single 8.5 x 11 page. Please let me know if you have any questions.
Here's the single card (1/4 of the sheet), so you can see the design.
Here's the full sheet of paper with 4 cards on it. This is very busy when you look at it, but it worked great when Janet cut the paper into quarters.
Thanks for visiting my blog!
Subscribe to:
Posts (Atom)